

Hey there! I'm a supplier of drag conveyors, and I've seen firsthand how these nifty machines can revolutionize material handling in various industries. Today, I'm gonna walk you through the process of installing a drag conveyor. Whether you're a seasoned pro or a newbie to the game, this guide will give you the lowdown on getting your conveyor up and running smoothly.
Pre - installation Checks
Before you even start unpacking the parts of your drag conveyor, there are a few crucial checks you need to do. First off, take a good look at the installation site. Make sure the floor is level and can support the weight of the conveyor when it's fully loaded. You don't want your conveyor tipping over halfway through operation!
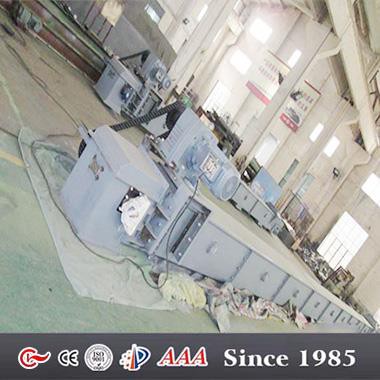

Measure the space carefully. You need to ensure there's enough room for the conveyor to fit without any obstructions. Check for any overhead pipes, beams, or other equipment that might interfere with the installation or the conveyor's movement.
Next, go through the conveyor components. Inspect each part for any damage that might have occurred during shipping. Look for bent frames, cracked chains, or any other visible issues. If you find anything amiss, contact us right away. We're here to make sure you get a top - notch product.
Assembly of the Conveyor Frame
Once you've cleared the pre - installation hurdles, it's time to start assembling the frame. Lay out all the frame sections according to the installation manual. We've made sure to include detailed diagrams to make this process as easy as possible.
Start by connecting the end frames. Use the bolts and nuts provided. Make sure to tighten them properly, but don't over - tighten as it could damage the frame. After the end frames are in place, start adding the intermediate sections. These sections are designed to fit together snugly, so align them carefully.
As you're assembling the frame, keep checking for levelness. You can use a spirit level to ensure that the frame is straight and even. This is important because an uneven frame can cause the conveyor to wear out prematurely and lead to operational problems.
Installation of the Chain and Flight System
The chain and flight system is the heart of the drag conveyor. It's what moves the material from one end to the other. Begin by installing the sprockets on the drive and idler shafts. Make sure they're properly aligned and tightened.
Next, thread the chain through the sprockets and the conveyor casing. This can be a bit tricky, especially for longer conveyors. You might need a helper to guide the chain through. The flights are attached to the chain at regular intervals. Make sure they're evenly spaced and securely fastened.
Lubricate the chain according to the manufacturer's recommendations. This will reduce friction and extend the life of the chain. We usually recommend using a high - quality chain lubricant that can withstand the operating conditions of your conveyor.
Electrical and Control System Installation
If your drag conveyor is motor - driven, you'll need to install the electrical and control system. First, mount the motor and gearbox in the designated location on the frame. Make sure they're properly aligned with the drive shaft.
Connect the electrical wiring according to the wiring diagram in the manual. This is a critical step, so if you're not confident in your electrical skills, it's best to hire a qualified electrician. The control system allows you to start, stop, and adjust the speed of the conveyor. Program it according to your specific requirements.
Test the electrical system before fully installing the conveyor. Make sure all the components are functioning correctly and there are no electrical shorts.
Final Adjustments and Testing
Once everything is installed, it's time for the final adjustments. Check the tension of the chain. It should be tight enough to prevent slipping but not so tight that it puts excessive strain on the sprockets and the chain.
Adjust the speed of the conveyor using the control system. Start with a slow speed and gradually increase it to the desired operating speed. Listen for any unusual noises or vibrations during the test run. If you notice anything strange, stop the conveyor immediately and check for the source of the problem.
Inspect the conveyor for any material leakage. The casing should be sealed properly to prevent the material from spilling out. Make any necessary adjustments to the seals or gaskets.
Benefits of Our Drag Conveyors
Our drag conveyors offer a range of benefits. They're highly efficient, capable of moving large volumes of material quickly and smoothly. They're also very durable, built to withstand the rigors of industrial environments. Whether you're handling grains, powders, or other bulk materials, our Grain Drag Conveyor Drag Chain Conveyor can get the job done.
Contact Us for Purchase and Consultation
If you're interested in purchasing a drag conveyor or have any questions about the installation process, don't hesitate to reach out to us. We have a team of experts who are ready to assist you. Whether you need a custom - designed conveyor for your specific application or just some advice on maintenance, we've got you covered.
In conclusion, installing a drag conveyor might seem like a daunting task, but with the right guidance and a bit of patience, you can have it up and running in no time. Our products are designed to be user - friendly and reliable, so you can focus on your business operations without worrying about conveyor issues.
References
- Manufacturer's Installation Manual for Drag Conveyors
- Industry Best Practices for Material Handling Equipment Installation